
Mojoe Masters - Craft a Christmas Cloche!

Dec 17, 2021
By Fiona
something beautiful for the big day?
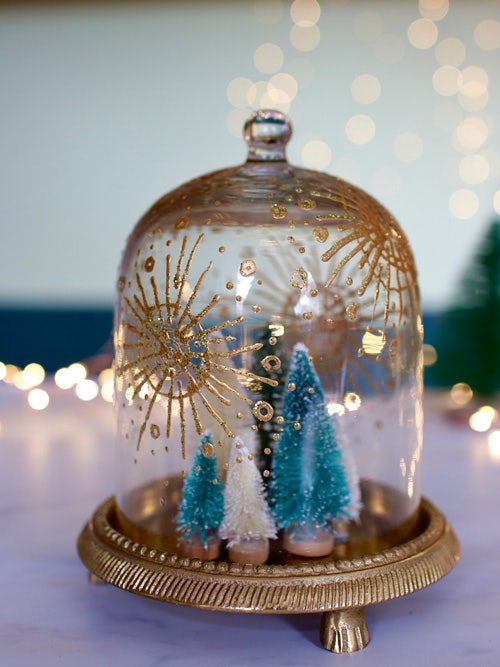
We’ve teamed up with the fabulous @hollyofalltrades to show you how you can upcycle a cloche for Christmas, with absolutely no experience needed! It turned out so fantastic, we’d keep this on display all year round!
What You’ll Need
A Cloche
Vinegar
Paper Towel
Gold or silver glitter
Gold or silver gold glass paint
Christmas ornaments
Paint brush
Step 1: Clean your cloche with vinegar to remove any dust and cleanse the surface of the glass
Step 2: Using gold glass paint, draw on your design. We recommend to start by drawing a small circle with outer rings of varying sizes, getting bigger with different sized spaces in between.
Step 3: Add in some lines from the outside going into the centre. These don’t have to be perfectly straight or the exact same length, as it’ll add to the overall effect in the end!
Step 4: Add some little spots and circles around the design as accents.
Step 5: Repeat the design in varying sizes all over the cloche until you reach the desired effect.
Step 6: While the paint is still wet, add a sprinkle of glitter over the designs you painted.
Step 7: Let the cloche dry for 24 hours before brushing off any excess glitter with a dry paint brush
Step 8: Bake the cloche according to the instructions on your paint
Step 9: Add your little decorations to the base of the cloche and arrange your ornaments to your liking. Stick down with blue tack.
Step 10: ‘Craft’ but not least, once your glass cloche has cooled, place it back onto the base. Now for the most exciting part, see where it’ll look best in your house!
There you have it – craft a magical marvel for the most wonderful time of the year! Let your Christmas guests admire your handiwork by placing it on the mantlepiece, show the world and display in your living room window, or even use as a centrepiece for the big day!
To see Holly Of All Trades in action – head over to our Instagram!
Merry Cloche-mas!
Joe
Scroll to top
-
- Latest Inspiration
- How to Wear and Style a Boho Dress
- How to Style a Jacket with a Spring Dress
- A Guide to Styling Heritage Jackets
- 6 Timeless Ways to Style a Leather Jacket
- The Detail Behind Our Dolce Vita Dress
- How To Style Red
- Valentine's Day Styles To Fall In Love With
- The Story Behind Our White Blouse
- 8 Ways to Style Your Favourite White Blouse
- Colour Edit: Shades Of Indigo
- Give Winter The Boot
- Spring Womenswear Top Picks
- Spring Menswear Top Picks
- 10 Ways to Welcome Boho Style Into Your Wardrobe
- View Our Inspiration & Ideas


