
7 Spring Crafts

Feb 17, 2022
By Bryony
After a winter that’s gone on for what seems like... ever... we’re getting unnaturally excited at seeing snowdrops and daffodils on our weekend walks. We think this year it’s time to welcome the spring with open arms.
There’s nothing like a breath of fresh air to put a spring in your step, so why not get out there and get the creative juices flowing to welcome the start of the warmer weather? Here are some spring crafts you can do to welcome the sun back into our lives!
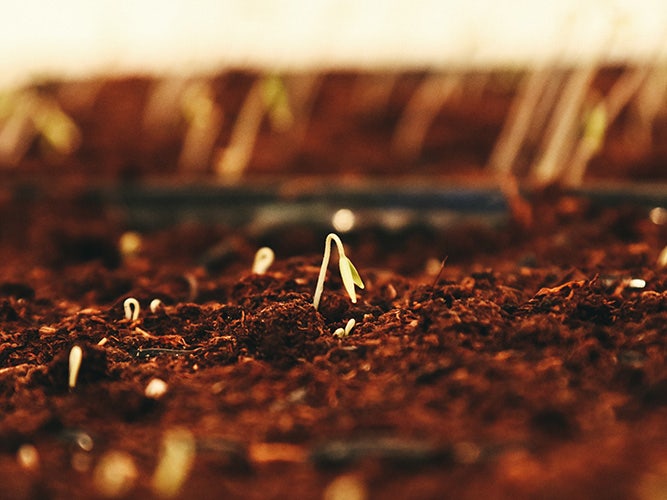
Sow some seeds
Growing your own veggies is a wonderful thing to do for the environment and planet, and a fun thing to do with all the family! You don’t even need a garden or allotment! Urban gardening has become a huge movement and we’ll share some tips on what to grow, and how!
If you have an old bucket lying around, grab some seeds and compost at your local supermarket. A great beginner-friendly plant are carrots, parsnips or potatoes, and you can see the best time to sow the seeds on the packet.
If you don’t have a garden to dig into, you can grow these in a trough or bucket and keep them out in the yard. Our favourite ones to grow are potatoes, as multiple potatoes can grow, so it’s like a treasure hunt when you harvest!
If you’re short on space, don’t worry – you can grow herbs or microgreens on your windowsill! Simply grab a pot of your favourite herbs from the supermarket, repot them and watch them grow!
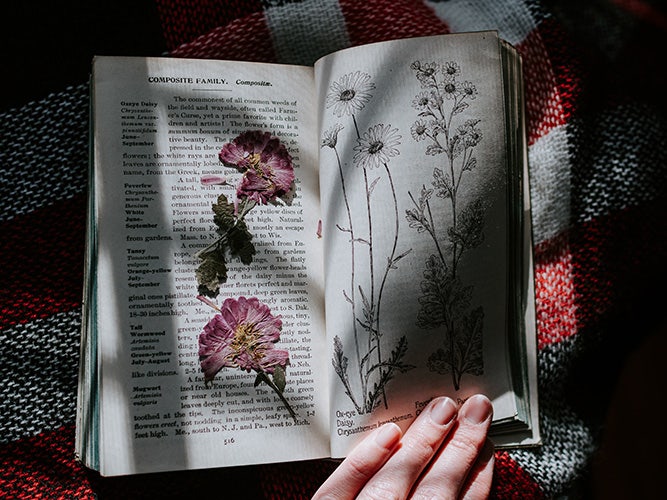
Flower pressing
With daisies, dandelions, buttercups, snowdrops and daffodils rising, why not start a spot of flower pressing? A quick guide means you need only a piece of baking parchment, a thick old book, and an iron (yes.) Press your flowers between the parchment and lay your thick tome over it. After a couple of hours, turn the heat on your iron to the lowest setting. Remove the book and iron over the flowers while they’re still between the parchment paper.
If you want to experiment further, you can create pieces of art with them. This is called Oshibana. Using some PVA or decoupage glue, stick the flowers to a piece of paper or card however you like. If you want to take it a step further, break out some watercolours and paint the white spaces! Use these as décor, birthday cards or even start a scrapbook!
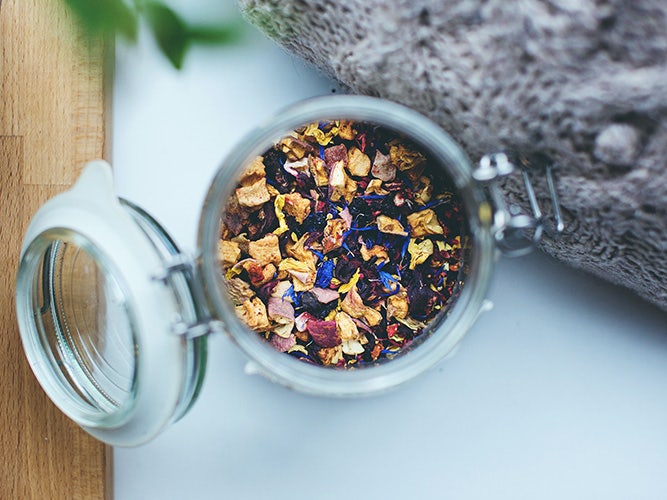
Make potpourri
Picked some flowers on your walk, or is your bouquet of flowers drying out? Don’t throw them away, make potpourri! Any kind of flower will work, especially ones that have a strong scent like lilies or roses. You can use the whole head or even just the petals.
- Preheat your oven to as low as possible, from 90 - 100℃.
- Place your flowers on a sheet of parchment paper on an oven tray. Arrange your flower heads on a single layer and add any extras, such as citrus slices, fresh herbs such as rosemary, thyme or lavender, cinnamon sticks or cloves.
- Add 15 drops of your favourite essential oil to one tbsp water and stray the potpourri ingredients, then place in the over for around 1 ½ - 2 hours, until the flowers are delicate and crisp, but not burnt.
- When removed from the oven, spray with more essential oil mixture and wait until cool to arrange.
You can keep this for as long as you like! To reinvigorate the scent, just spray more essential oil mixture and give it a good toss before placing back in your bowl.
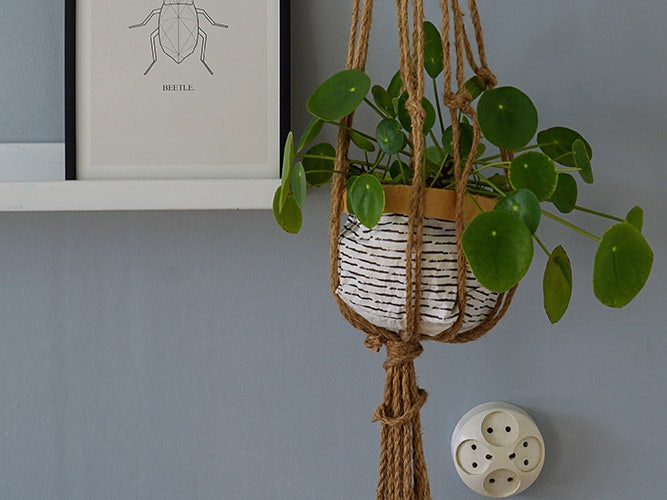
Hanging baskets with old kitchenware
We love a bit of upcycling – especially when it’s thrifty! Why not take a walk around some charity shops for old kitchenware, tin colanders or other containers to make hanging baskets from? All you need is some rope or twine and the ability to tie a basic knot. Grab your favourite flowers and a little compost, then you're good to go!
There are so many different ways and designs to hang your hanging basket with rope – find your favourite on YouTube and follow the tutorial to make a wonderful upcycled hanging basket. If you want to go the extra mile, why not find some tin paint and customise it even further?
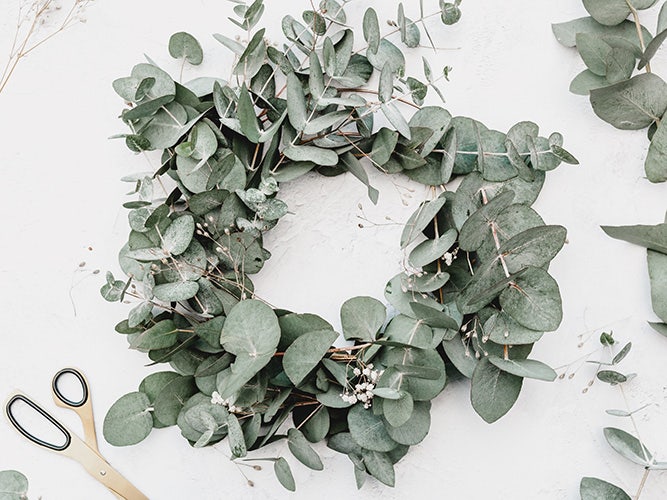
Spring wreath
Wreaths are all the wrage! From autumnal to festive, why not carry on the tradition and create a spring one? All you need is a glue gun or some strong glue, some wire or bendy twigs and foraged foliage. Good options for materials are moss, clay eggs, twigs and branches with leaves, you can even upcycle your old seed packets and arrange them among the leaves to make it more spring-themed and artsy!
However you decide to do it, it'll be totally unique to you – and we’re sure it’ll look great!
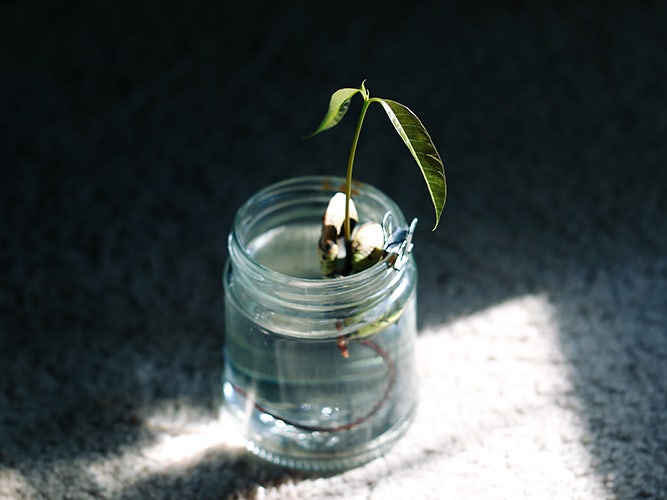
Propagate plants
Why not make a garden of your own from wild plants you find around? If a wild rose is beginning to bloom, slice a twig off and put it in a pot with water to see if it regrows! Don’t be fooled by the plant food that you think you might need – honey works just as well and has all the enzymes that plant food does!
Simply dip the twig end of the rose into honey and place in a glass of water. Remember to replace old water with a fresh bit every couple of days or so and watch your rose plant grow! You can do the same with avocado seeds, garlic and even spring onion!
Make a terrarium
If you have an old glass jar lying around – make a terrarium! A terrarium is a live ecosystem in your very own home that you can watch grow and develop for years to come! All you need is soil and foraged bits of flora from a spring walk. Moss and soil is absolutely essential, but sand, small twigs, seedlings, pebbles and cones as well as bits of grass are perfect too! (Plus, it might sound gross, but if you can find some ants or a worm, that’ll be even better to give them a happy home and to keep your ecosystem developing!)
Create the first layer of your terrarium by mixing soil and sand together and lay at the bottom of your jar. Spray with a little bit of water then get creative! Pat down your moss, grass and anything else you’ve collected (including any critters) until you’re happy with your design. Then spray your little ecosystem with a few sprays of water (not too much though) and seal your jar firmly.
This is best to be placed in indirect light and turned every once in a while, to let the sun photosynthesise the greenery in your terrarium to keep it developing. There’s no need to open it ever again, as it’s self-sufficient and will keep on living, growing and developing as long as it’s happy and healthy. You might want to take some pictures to see the progress though!

We’ve been totally inspired by the smell of spring in the air, as well as the launch of our new collection, so we hope you enjoy these handy little crafts and try some with all the family!
To keep up to date with our adventures, be sure to check in on our blog every once in and while and see what we get up to! Happy spring time!
Joe.
Scroll to top
-
- Latest Inspiration
- How to Wear and Style a Boho Dress
- How to Style a Jacket with a Spring Dress
- A Guide to Styling Heritage Jackets
- 6 Timeless Ways to Style a Leather Jacket
- The Detail Behind Our Dolce Vita Dress
- How To Style Red
- Valentine's Day Styles To Fall In Love With
- The Story Behind Our White Blouse
- 8 Ways to Style Your Favourite White Blouse
- Colour Edit: Shades Of Indigo
- Give Winter The Boot
- Spring Womenswear Top Picks
- Spring Menswear Top Picks
- 10 Ways to Welcome Boho Style Into Your Wardrobe
- View Our Inspiration & Ideas


