
Let’s Get Crafty: How to upcycle a lamp with a Joe Browns twist!
May 18, 2021
By ScottH
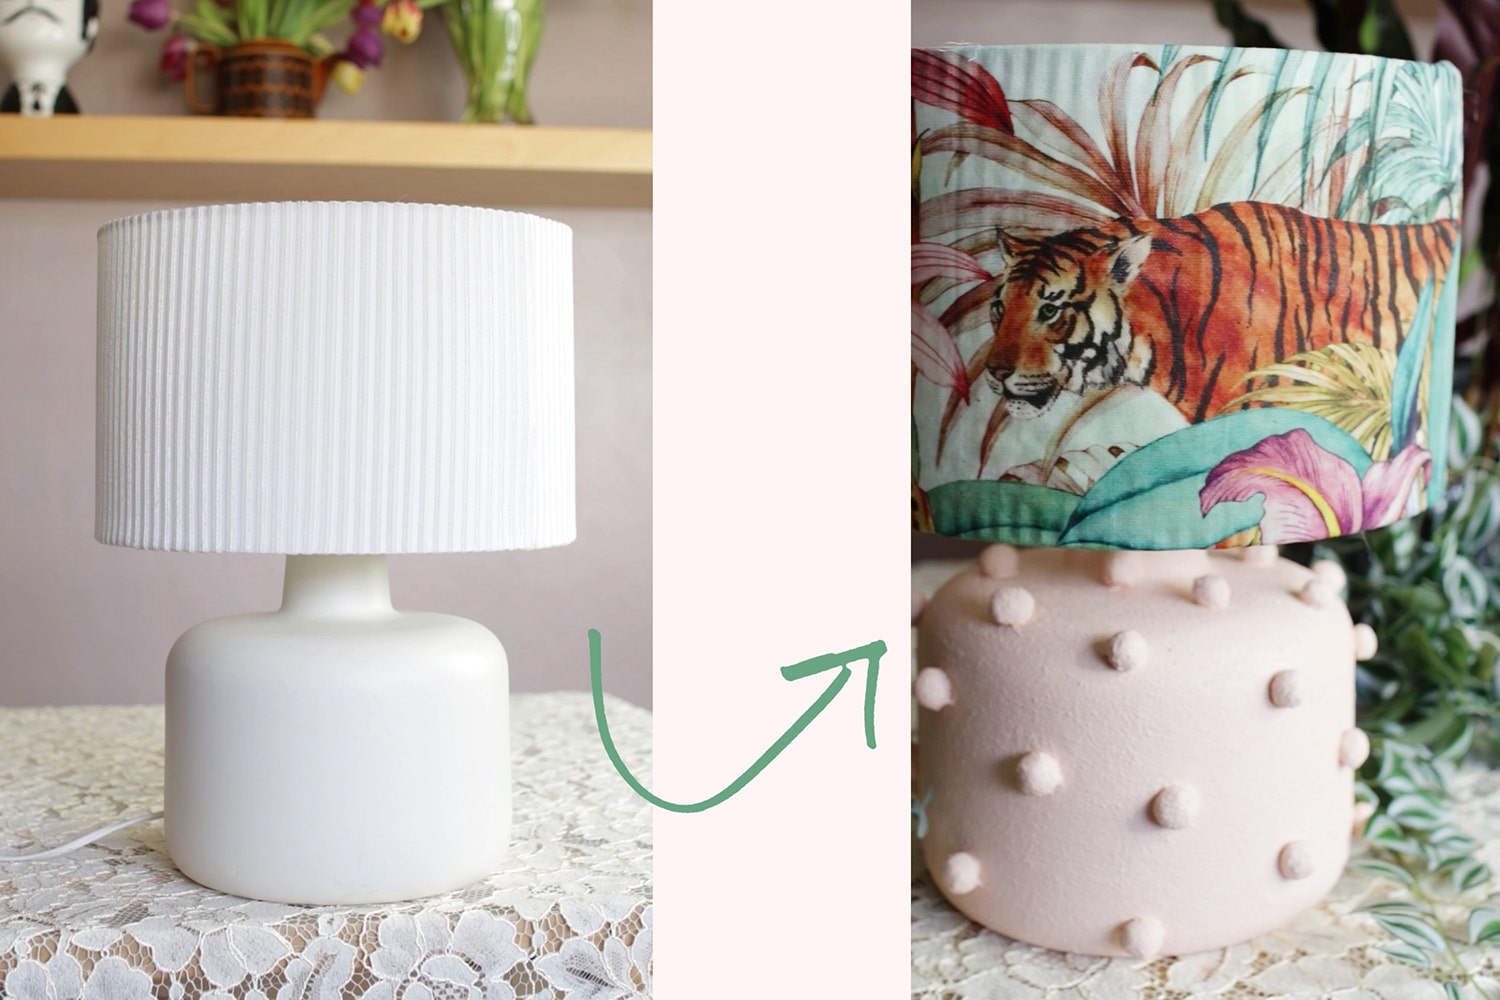
Welcome to the third instalment of our 'Let’s Get Crafty' series, this time courtesy of the fabulous @hollyofalltrades.
Holly takes us on a creative journey, guiding us on how to transform a dull and boring lamp into a simply remarkable one in eight simple steps.
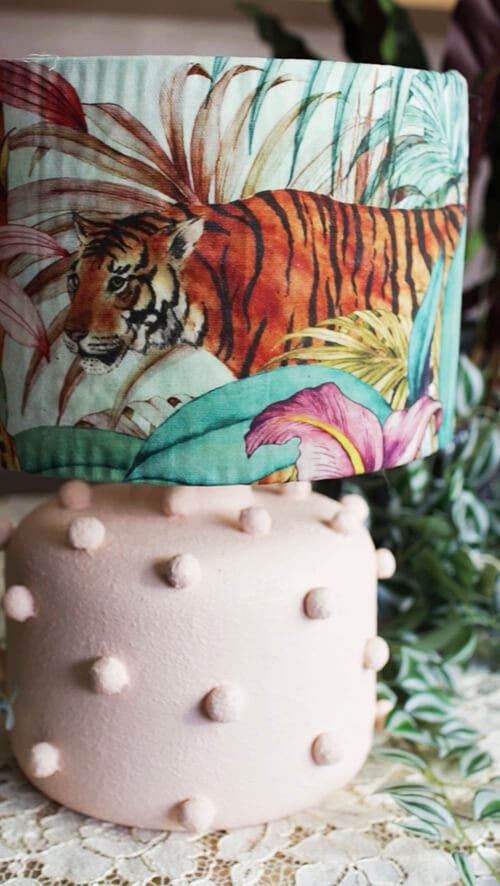
On this occasion, Holly took two of our ‘Truly Tropical Teatowels’ and used them to redecorate a lampshade. Perhaps you have some tea towels that you think would look amazing as a lampshade or maybe some old fabric that you want to give a new lease of life?
If this crafty creation sounds up your street, take a scroll through the instructions and give it a go!
What you’ll need:
-
Fairly rigid fabric. Holly has used two of our ‘Truly Tropical Teatowels’.
-
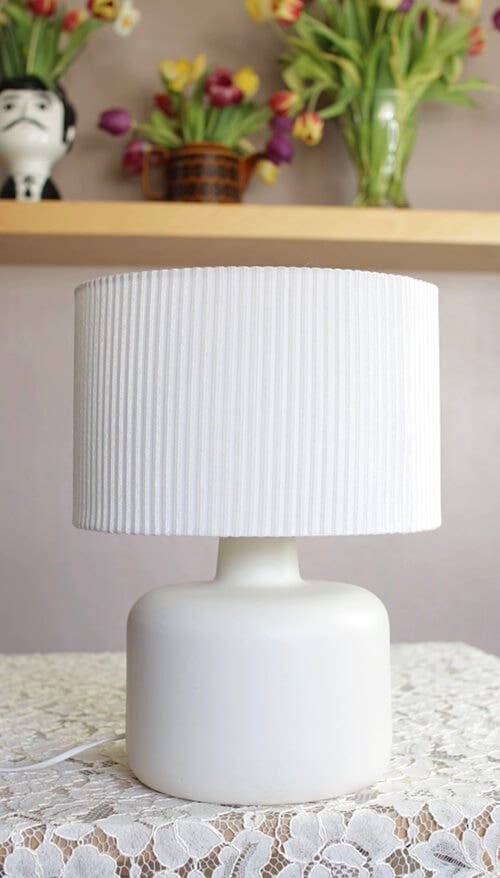
Old lamp base and lampshade.
-
1 packet of air-dry clay.
-
Glue gun.
-
A few pots of either acrylic, gloss or house paint.
-
1 pot of bicarbonate soda.
-
1 paintbrush.
-
1 can of spray adhesive.
-
Fabric scissors.
-
Baking tray or any plastic tray you have lying around.
Step 1:
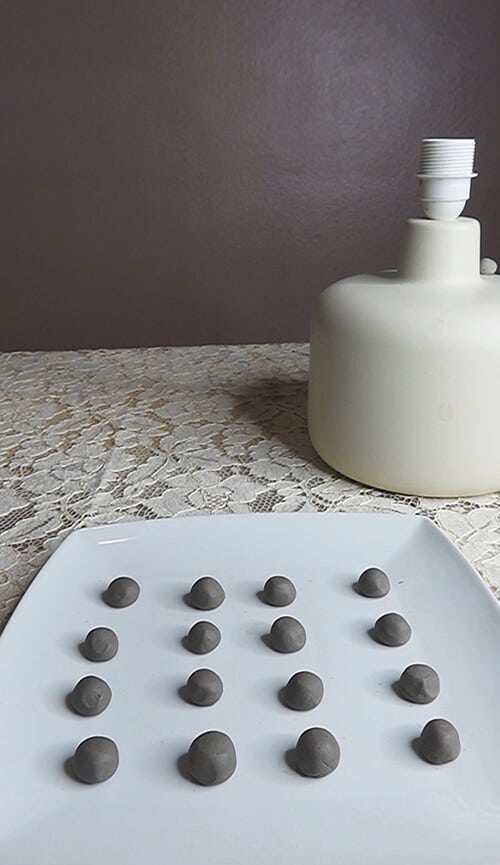
Create some small balls using air dry clay and press them lightly onto a baking tray to give them a flat base. Make as many as you need to cover the lamp base (Holly made 16). Once done, leave the air-dry clay to dry for 24 hours.
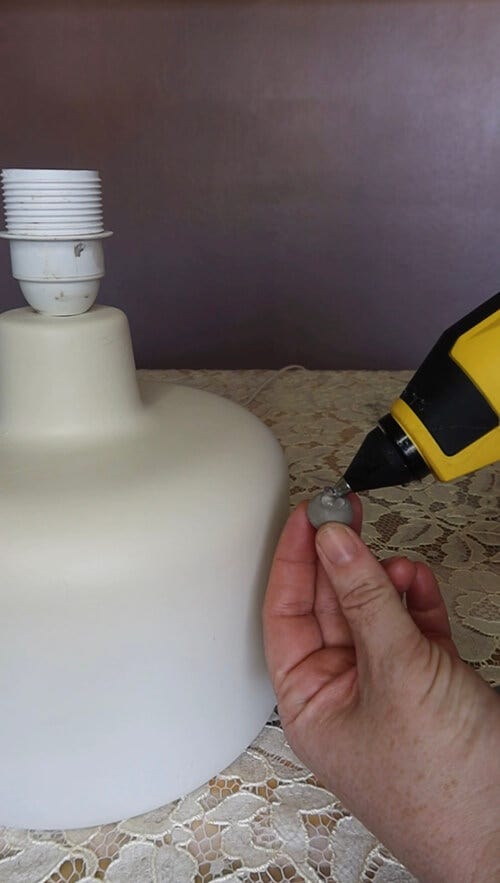
Step 2.
Once the clay balls are dry, use a glue gun to stick them to the base of the lamp. Hold in place to ensure they have stuck properly.

Step 3:
You can either leave the lamp base as it is or paint over the entire lamp base (clay balls included) with an acrylic, gloss or house paint of your choice. Why not combine two colours to get a shade you want? Holly mixed peach and white paint to achieve a terracotta colour.
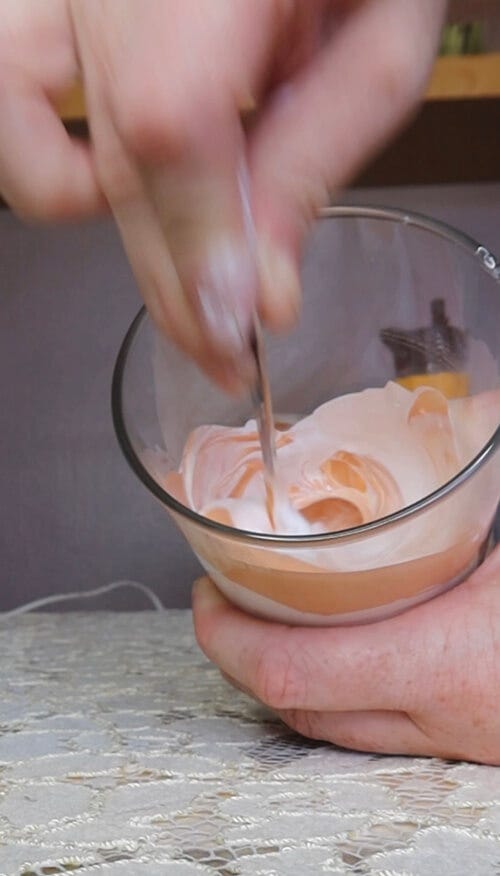
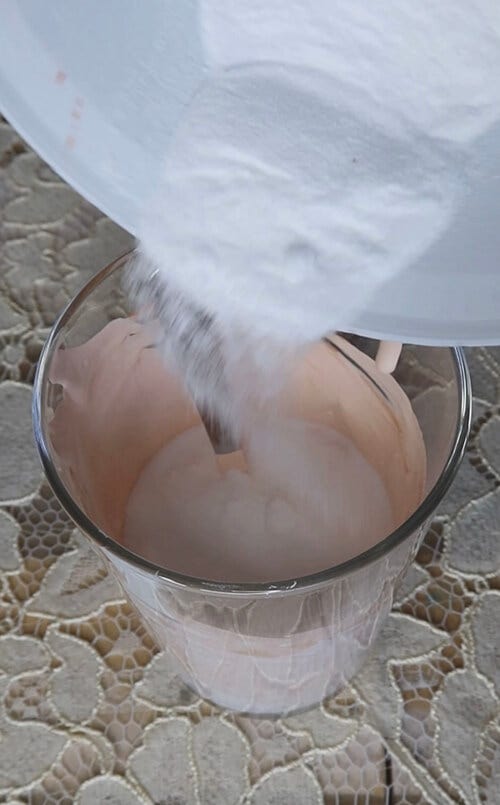
Step 4:
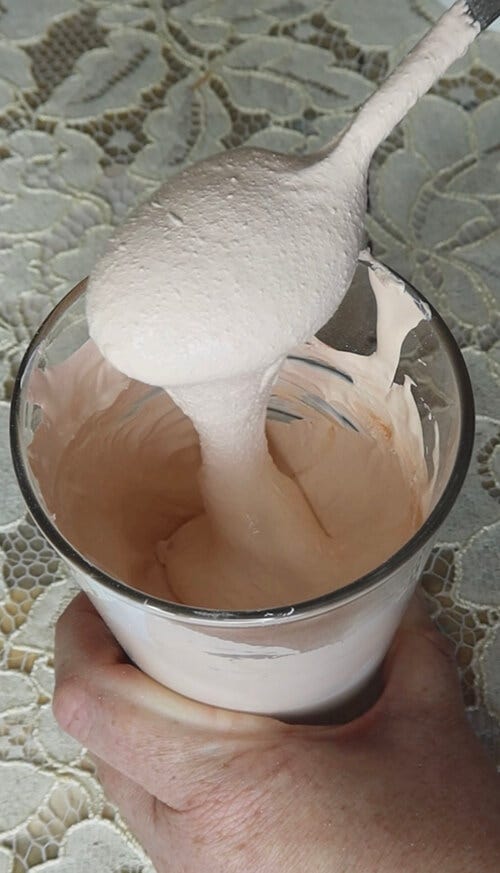
Next, mix some baking soda into the paint mixture to give the paint a little texture. Holly used a ratio of one pot of bicarbonate soda to two pots of paint. Combine until the mixture has a slightly lumpy, gloopy texture.
Step 5:
Paint a thick layer of the mixture over the entire lamp base. Rather than using long brush strokes, Holly recommends dabbing the paintbrush to achieve a better end result.
Tip: Don’t worry if the first coat of paint doesn’t cover the original base colour, simply paint over again with a second coat.

Step 6:
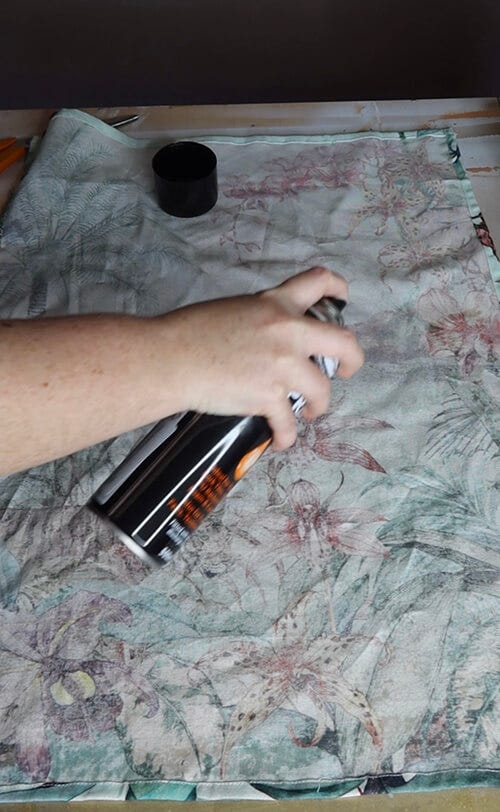
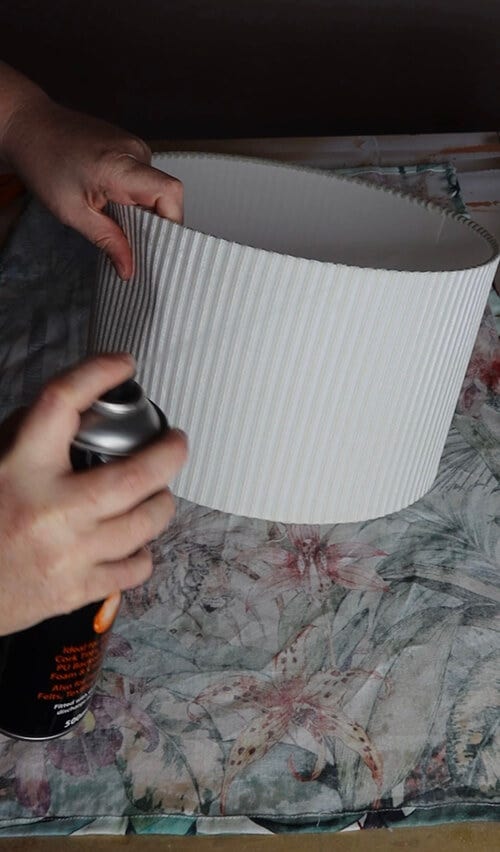
Set the lamp base to one side to dry and grab your lampshade.
Flip the fabric (or in this case a teatowel) on its back and spray a fair amount of spray adhesive over the lampshade and fabric until they are saturated. Leave both until they feel tacky to touch.
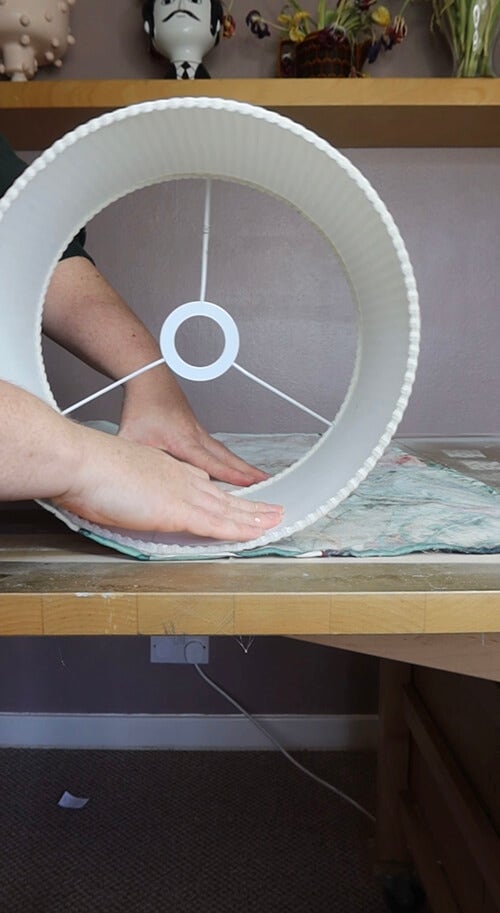
Step 7:
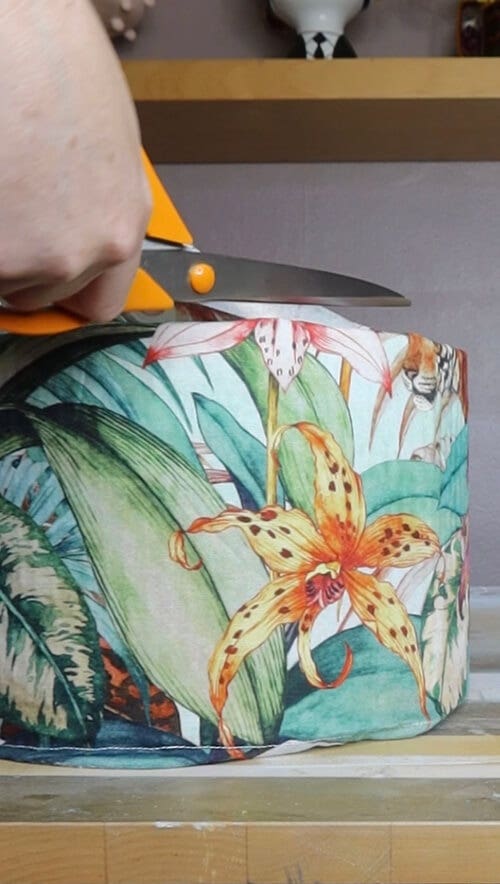
Once tacky, roll the lampshade over the fabric so it sticks. When you’re happy with the positioning of the fabric on the lampshade, smooth over with your hands to secure it and cut off the excess fabric at the edges (you can leave a little fabric as we’ll hide it in the next step).
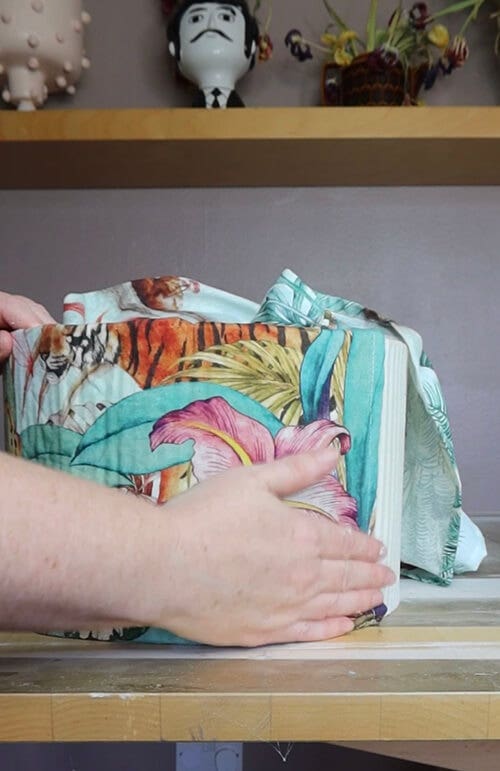
Step 8:
Next, use a hot glue gun to stick down the edges of the fabric to both the top and bottom of the inner lampshade.
Once the base and shade are dry, pop the lampshade onto the top of the base and bobs your uncle - your stunning new DIY lamp is complete! Now all that’s left to do is choose its new home…
We hope you’ve enjoyed learning how to reinvent an old lamp into something rather fabulous for your home! If it’s inspired you to get crafty, we’d love to hear about it! You can watch Holly’s ‘How To’ video over on our Instagram page here.
For more crafty inspiration, head here to check out how to ‘How To Make A Recycled Hair Scrunchie’ and here to check out ‘How To Make A Recycled Wall Hanging’.
Scroll to top
-
- Latest Inspiration
- How to Wear and Style a Boho Dress
- How to Style a Jacket with a Spring Dress
- A Guide to Styling Heritage Jackets
- 6 Timeless Ways to Style a Leather Jacket
- The Detail Behind Our Dolce Vita Dress
- How To Style Red
- Valentine's Day Styles To Fall In Love With
- The Story Behind Our White Blouse
- 8 Ways to Style Your Favourite White Blouse
- Colour Edit: Shades Of Indigo
- Give Winter The Boot
- Spring Womenswear Top Picks
- Spring Menswear Top Picks
- 10 Ways to Welcome Boho Style Into Your Wardrobe
- View Our Inspiration & Ideas


